The following information is for the EMANT300, EMANT380
Exercise 15 – Create an Instrument User Interface
Objective
Use third party controls
Use Emant300 component

In this final exercise, you will build a computer based light logger with a modern GUI.
 Open
the Visual Basic solution VB_2010_Solution.sln.
Open
the Visual Basic solution VB_2010_Solution.sln.Set the WinLogger project as the startup project.
To view the project code, select the project's Form1.vb and press F7
 If
you are using the EMANT380
Bluetooth DAQ, change the parameter to False and COM5
to the COM port you are using, See exercise 1 step 4.
If
you are using the EMANT380
Bluetooth DAQ, change the parameter to False and COM5
to the COM port you are using, See exercise 1 step 4.
DAQ.Open(False,"COM5")For Windows Application, there is another Windows Forms view. To view the Form, select the project's Form1.vb and press Shift-F7
- Press F5 to Start without Debugging.
 Click the Start Button to start
measurements. This
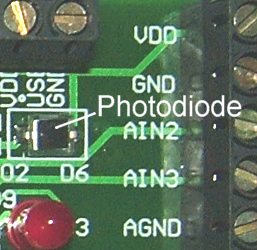
Visual Basic program uses the Photodiode on the Light Application
Adaptor to measure the light intensity. The result is shown in Lux.
Cover the Photodiode with your hand or shine a torchlight on it to
observe the change in light intensity measured.
Click the Start Button to start
measurements. This
Visual Basic program uses the Photodiode on the Light Application
Adaptor to measure the light intensity. The result is shown in Lux.
Cover the Photodiode with your hand or shine a torchlight on it to
observe the change in light intensity measured.Change the values in the numeric control. The LED will change color if the light intensity exceeds the set value.
Press the Stop button to stop measurements.
Close the Window to end the program.
Program 15.1 WinLogger
Public Class Form1
Private Sub Timer1_Tick(ByVal sender As System.Object, ByVal e As System.EventArgs)_
Handles Timer1.Tick
  Dim volt, lux As Double
  volt = Emant3001.ReadAnalog(Emant.Emant300.AIN.AIN0, Emant.Emant300.AIN.COM)
  lux = 1333 * volt
  AnalogMeter1.Value = lux
  LineGraph1.Value = lux
  Led1.Value = lux > NumericUpDown1.Value
  Label1.Text = lux.ToString("0.0 Lux")
End Sub

Private Sub Button1_Click(ByVal sender As System.Object, ByVal e As System.EventArgs)_
Handles Button1.Click
  Emant3001.Open(True, "COM5")
  Timer1.Enabled = True
End Sub

Private Sub Button2_Click(ByVal sender As System.Object, ByVal e As System.EventArgs)_
Handles Button2.Click
  Timer1.Enabled = False
  Emant3001.Close()
End Sub

End Class
Controls
Label Control
NumericUpDown Control
Button Control - Property
Button1.Text → Start
Button2.Text → Stop
Timer Component
LED Control
LineGraph Control - Property
LineGraph.AutoscaleY → True
Emant300 Component
Note that the Timer and Emant300 are components. They do not appear (or is invisible) during run-time.
Events
An Event in Windows can be activated by the user clicking on a button or when the timer interval lapses.
When the Start button is pressed, connection is made to the DAQ module and the timer is enabled
Private Sub Button1_Click(ByVal sender As System.Object, ByVal e As System.EventArgs)_
Handles Button1.Click
  Emant3001.Open(True, "COM5")
  Timer1.Enabled = True
End Sub
When the Stop button is pressed, the timer is disabled and the connection to the DAQ module is closed
Private Sub Button2_Click(ByVal sender As System.Object, ByVal e As System.EventArgs)_
Handles Button2.Click
  Timer1.Enabled = False
  Emant3001.Close()
End Sub
As the timer elapsed event is fired every 100ms, the voltage is read, lux is calculated and displayed.
Private Sub Timer1_Tick(ByVal sender As System.Object, ByVal e As System.EventArgs)_
Handles Timer1.Tick
  Dim volt, lux As Double
  volt = Emant3001.ReadAnalog(Emant.Emant300.AIN.AIN0, Emant.Emant300.AIN.COM)
  lux = 1333 * volt
  AnalogMeter1.Value = lux
  LineGraph1.Value = lux
  Led1.Value = lux > NumericUpDown1.Value
  Label1.Text = lux.ToString("0.0 Lux")
End Sub
Assigning Values to the Controls
AnalogMeter1.Value = luxassign the lux value to the AnalogMeter1
LineGraph1.Value = luxassign the lux value to the LineGraph1
Led1.Value = lux > NumericUpDown1.Valuethe Led1 state depends on whether the measured lux value exceeds the NumericUpDown setting
Label1.Text = lux.ToString("0.0")In Exercise 4, you learnt about the Convert class in the System namespace. In this example, we convert a double to a string. The optional format “0.0” instructs the method to display the string with one decimal place.
Build this project from scratch

Temperature Alarm and Acknowledgment (optional exercise)

Measure Temperature in oC
Display result in Line Chart and thermometer.
If temperature exceed preset value on Numeric Control, turn the physical Red LED on and leave on until alarm is acknowledged.
When the physical button is pressed to acknowledge alarm, turn off Red LED
Use check box to allow user to show temperature in oC or oF
Hint:
see Exercise 7, 8, 9